A comprehensive guide on setting the bar way too high for future Christmas presents
I had been rewatching the trailer for Fantastic Beasts and Where to Find Them for the third or so time when it clicked. I had to build a version of the Niffler. It would be the best Christmas present for my girlfriend, because I knew that she’d love that adorable scoundrel maybe even more than I did.
What it needed to be
For me it helps to set goals. Summing up the things the final product needs to have helps tons. I started off with these:
- Huggable. This was paramount.
- Hollow with a bellypouch to hide other gifts
- Adjustable limbs
- Adorableness
How I reached those goals
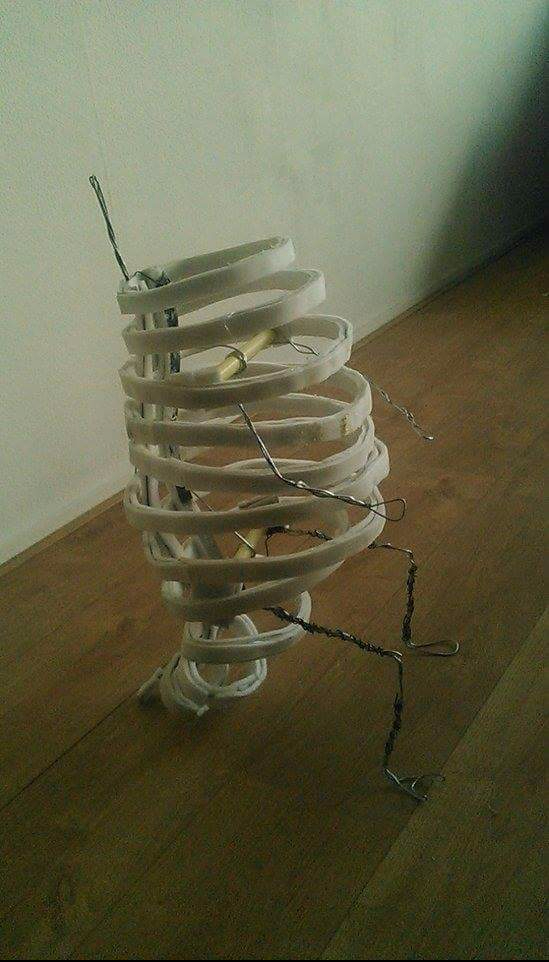
With these in mind I started designing. Mind you, I am a do-er, not a thinker, but I try. The structure of the body, as seen below was inspired by Adam Savage’s bear costume build. Look it up, it’s great. Instead of Rotan, I opted for thick steel wires. This because I wouldn’t need to order the former. The spines (there’s two for stability) are also made out of wire. I sandwhiched all of these between two layers of EVA-foam to cover up any sharp bits and to set the first steps to huggable was.
The ribs were glued to the spine with hot glue, which is great with EVA-foam. I, then, figured out the height of the shoulders and glued in electrical tubing as a place for the arms and legs to attach. These were made out of thick steel wire.
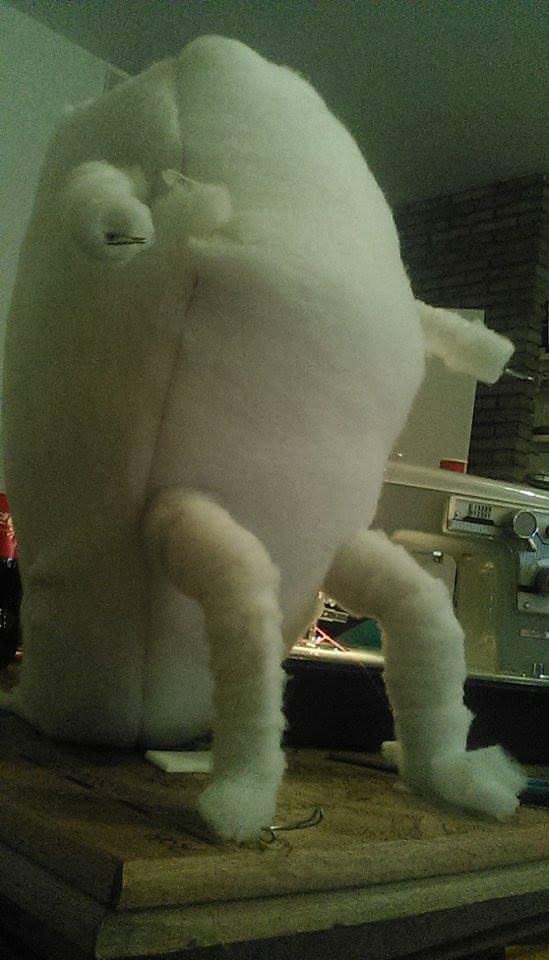
With this stage done it was time to increase to huggableness. This thing, even though adorable in an odd way, was hard and bouncy; not soft. I opted for a type for a solid 10 meters of blanket stuffing.
I took measurements, drew up some patterns and went on to very carefully sow the bits of stuffing together. The final result, after stuffing the wire and foam body into this very soft cocoon is visible just below.
After that it was time to work on the head. I decided that fiberglass would be way over the top for this, but I needed the beak to be light. Simply using paper mache powder wouldn’t work, as it would end up being way too heavy.
I went for something that I’d seen Kamui Cosplay do. I built a skeleton of cardboard outlining the basic shape of the head. Then filled in the gaps with PU-foam. After letting it set I took a steak knife and carved out the basic shape. Covering this up with paper mache resulted in the head you can see below.
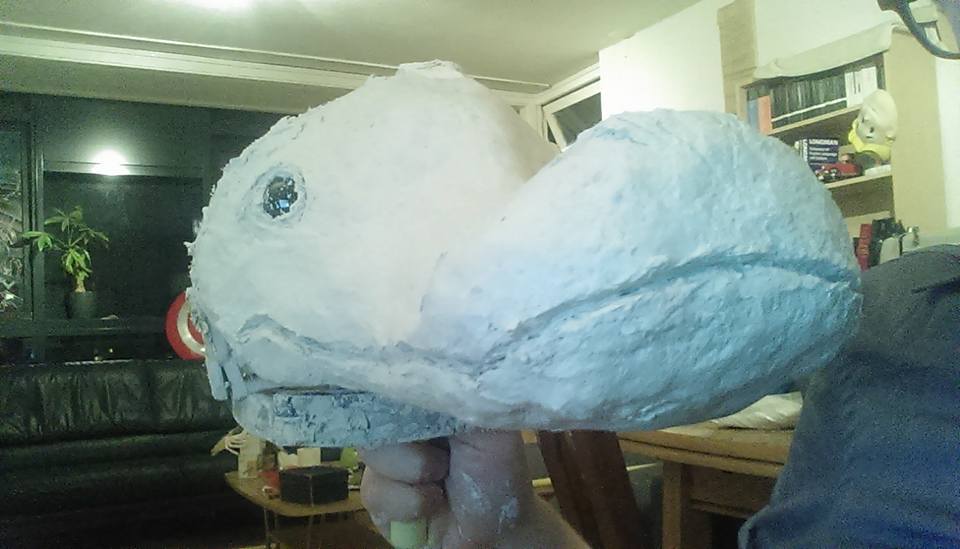
I made the eyes using acrylic glass that I melted into shape with a heat gun. When the paper had dried to it’s maximal hardness, I sanded it smooth. After taking it to 300 grit, I covered it with three layers of woodglue (light sanding between layers)
I also carefully covered the body with a short-haired fake fur. This was done in the same way as I had done the blanket stuffing.

It was at this point that I figured out that the eyes were terribly small. I made larger ones and put them in place using an epoxy putty. With those beauties in place and some more sanding, it was time for painting. After a layer of primer, I tried to mimic the beaks colours using acrylic paints.
And there you have it, the creepiest photo of this project. One of my students lovingly called this an abomination and earned bonus vocabulary points.
I soldiered on, adding a few layers of batting before applying the smooth fake fur. I made sure to get the flow of the hairs to match those on the body.
Then the hands and feet. This is where time became a serious issue. I had only two evening left to build the skeletons of the limbs, cover them in fur and paint them. Even worse, I at first made the mistake of trying to work with liquid latex (don’t Google this stuff in public).
After passing on sleep for a night and stabbing myself with needles for five times, I finished the fur on the fingers and feet. I had been smart enough to sculpy the claws straight onto the wires of the fingers. This made them quite strong and durable. 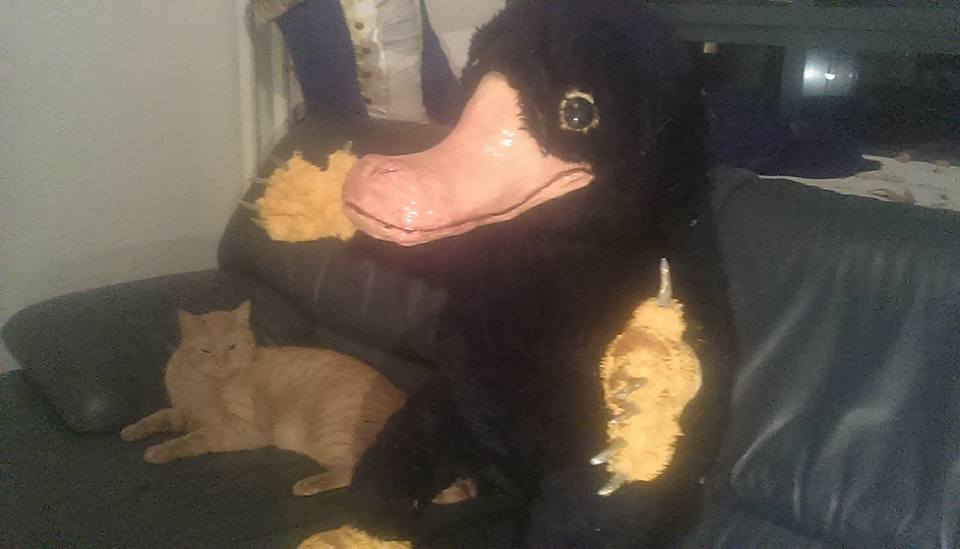
All that was left to do was to touch up the paint here and there. It was difficult to achieve a fully natural look on the fake fur of the fingers and feet, but at least now they are huggable. The liquid latex hands would have been downright creepy.
And there you have it. A finished Niffler. A mad project to try to finish within a month while also having a rather busy time at school, but so worth it the effort.

