Design
I had never heard of these before, but I’m not in the period of my life in which everyone around me is getting married. Yet.
Good friends recently asked whether I could make one. I said yes, having had experience through building the “How to Horse” sign.
This project, though, presented an obstacle that I hadn’t encountered, yet: Tree slab sales companies. I was lucky to have ordered various samples. Most of the slabs ended up cracking, or worse, worse hollow-y on te inside.
Tools used:
– Dremel 4000
– Router base for Dremel tool
– Router bit set for Dremel
– Random orbit sander
– Paintbrush
– Can
– Rag to spread the beeswax
Materials used
– Tree disk with a diameter of roughly 25cm
– Black paint
– Sanding disks for the orbital sander
– Beeswax
– Water to rinse the brush
I started out by visiting Pinterest. It is no overstatement that a world opened up for me. Honestly, there are so many examples of designs. My clients had given me a description of what they wanted. They asked for a not-too-busy design. With that in mind I ordered some Tree disks in various sizes. The delivery never made it to my house. I tried again, this time first ringing the company. I ended up receiving the disks two days later.
I brought all the disks to the shed, and, being super scared the ornament would crack later on in the build, let them acclimatise there. After a few days I picked out the best looking one and made a photo from straight above it.
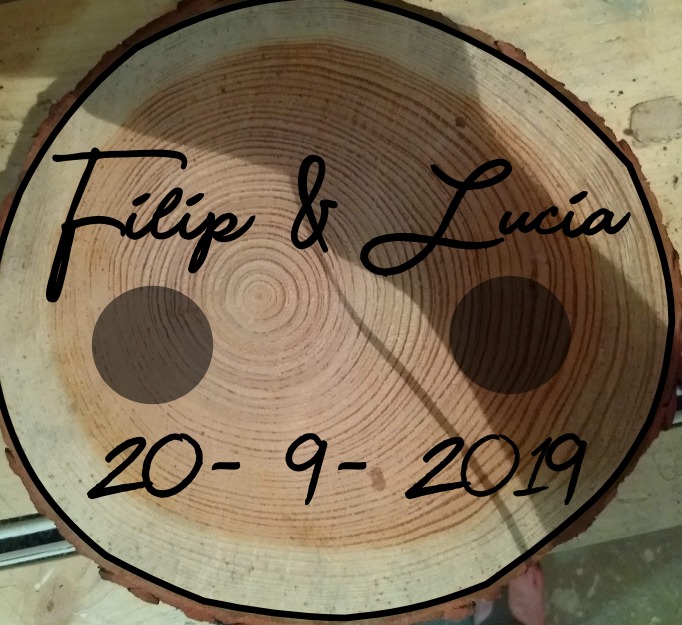
In InkScape I drew out the outline and set up the simplistic design I had thought up. I then proceeded to forget to print it out at work for several weeks. I then took the dignified route, and zoomed in on my desktop screen and copied it onto a sheet of paper.
Build
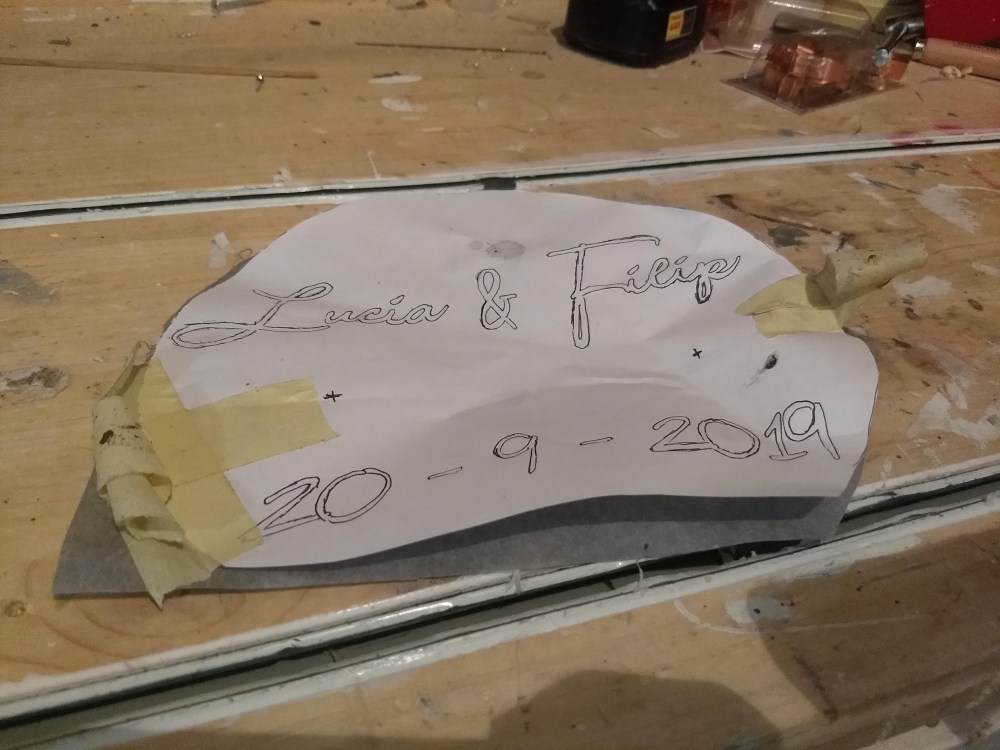
I cut out that piece of paper, added a sheet of carbon paper and taped it around the tree disk. After that, I was ready to use the Dremel with router base for the first time.


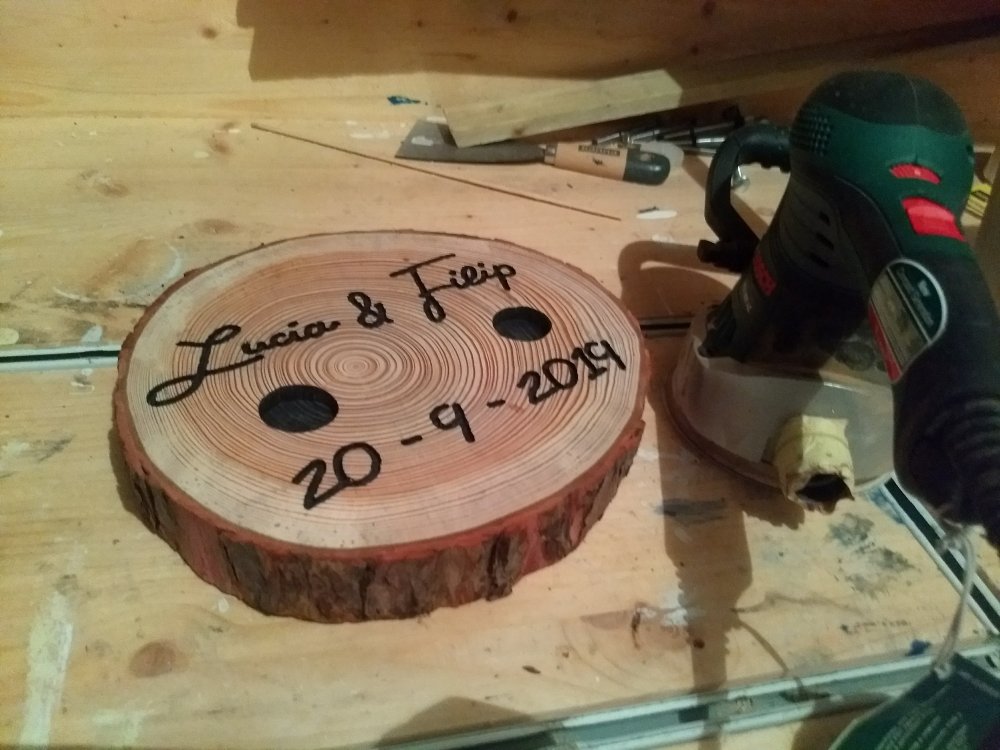
And I must say, what a joy! I love doing this engraving work. It’s quite calming and, as opposed by sanding, you can really see that progress coming along. Although the Dremel base for routing is mainly plastic, the quality did not disappoint. The letters came out really crisp. The only thing I missed was an opportunity to attach my shopvac. I had to stop working to suck away the mess at times. The horror.
I cut out the bigger holes with the router, because I had been longing to use it again. Afterwards, I made a mess.

It was on purpose, though. I added lugubrious amounts of acrylic paints to colour the insides of the letters. The spillage I sanded away after it had completely dried.
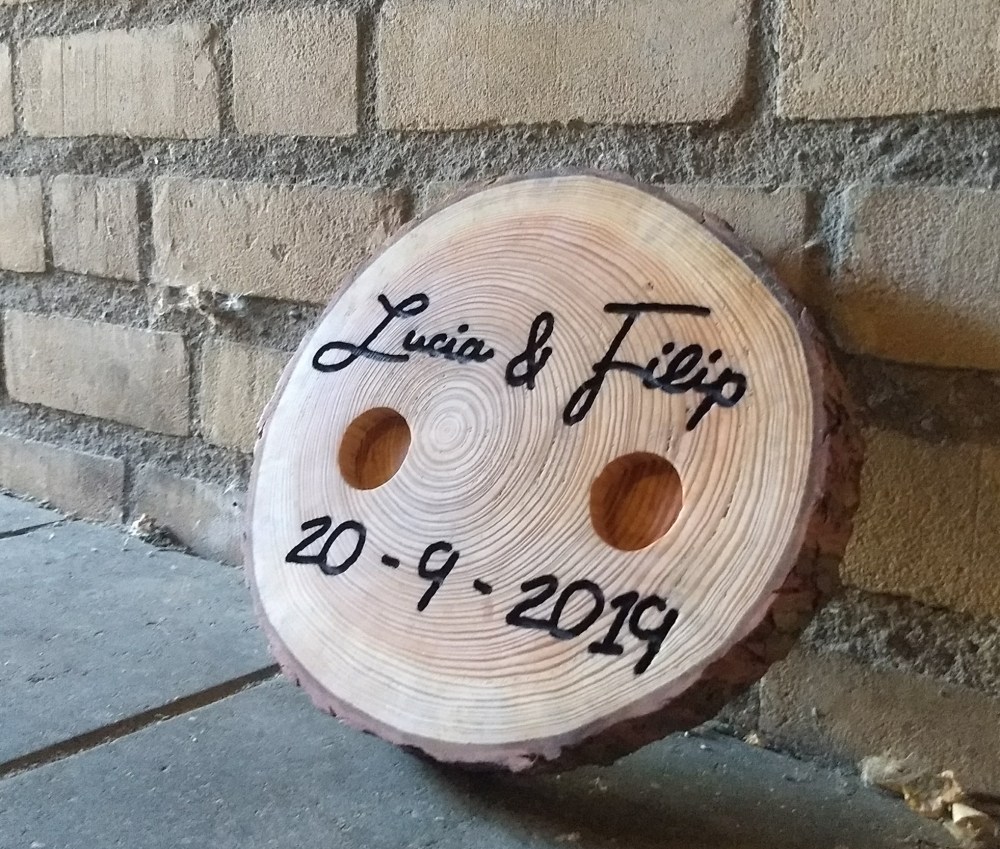
A lot of sanding later, the rings were coming out tremendously well, too. God, I love working with “natural” wood. To make it all look less natural, I finished it with beeswax.
After that dried, it looked like this.